Build a Taobao Robotic Purchasing Tool in Two Minutes
Info
Author: Vincent、Void; Published on 2021-06-08; Read time: about 4 minutes; WeChat Public Account Article Link:
1 Pain Points
Major eCommerce websites offer promotional activities on specific days, such as 618 and Singles' Day. Sometimes, you need to be alert to snap up limited-release products. However, is your success rate high? Do you often encounter situations where the app is always loading, and after refreshing, you find that a product has been snapped up before you? The fact is that many of your competitors who compete for the same products are faster and more accurate than you because they can execute commands precisely with a robot.
Are you frustrated? It doesn't matter. This article will teach you how to build a robot of your own from scratch. It will automatically place orders at the set time, and you will no longer worry about missing your favorite products!
2 Preparation
Before building a robot, please make sure you have the following tools:
- A computer: it doesn't need to be fast or new, just anything that works.
- Chrome browser: the robot will complete the automatic purchasing process on Chrome.
- Python programming environment: Don't worry; you don't need to know how to code because the code has been written for you. However, you need to install software that can run it, so you need to configure the Python programming environment. Windows and Mac users should configure it according to their corresponding methods.
Configure the Python Programming Environment
The following steps apply to Windows systems.
Anaconda is an open-source Python distribution that integrates Python and numerous scientific packages.
- Step 1: Download the Windows version of Anaconda's 64-Bit Graphical Installer
- Step 2: Install Anaconda
- Step 3: Open Anaconda Navigator and click
Launch NotebookorJupyterLab.
Then you'll see this screen:
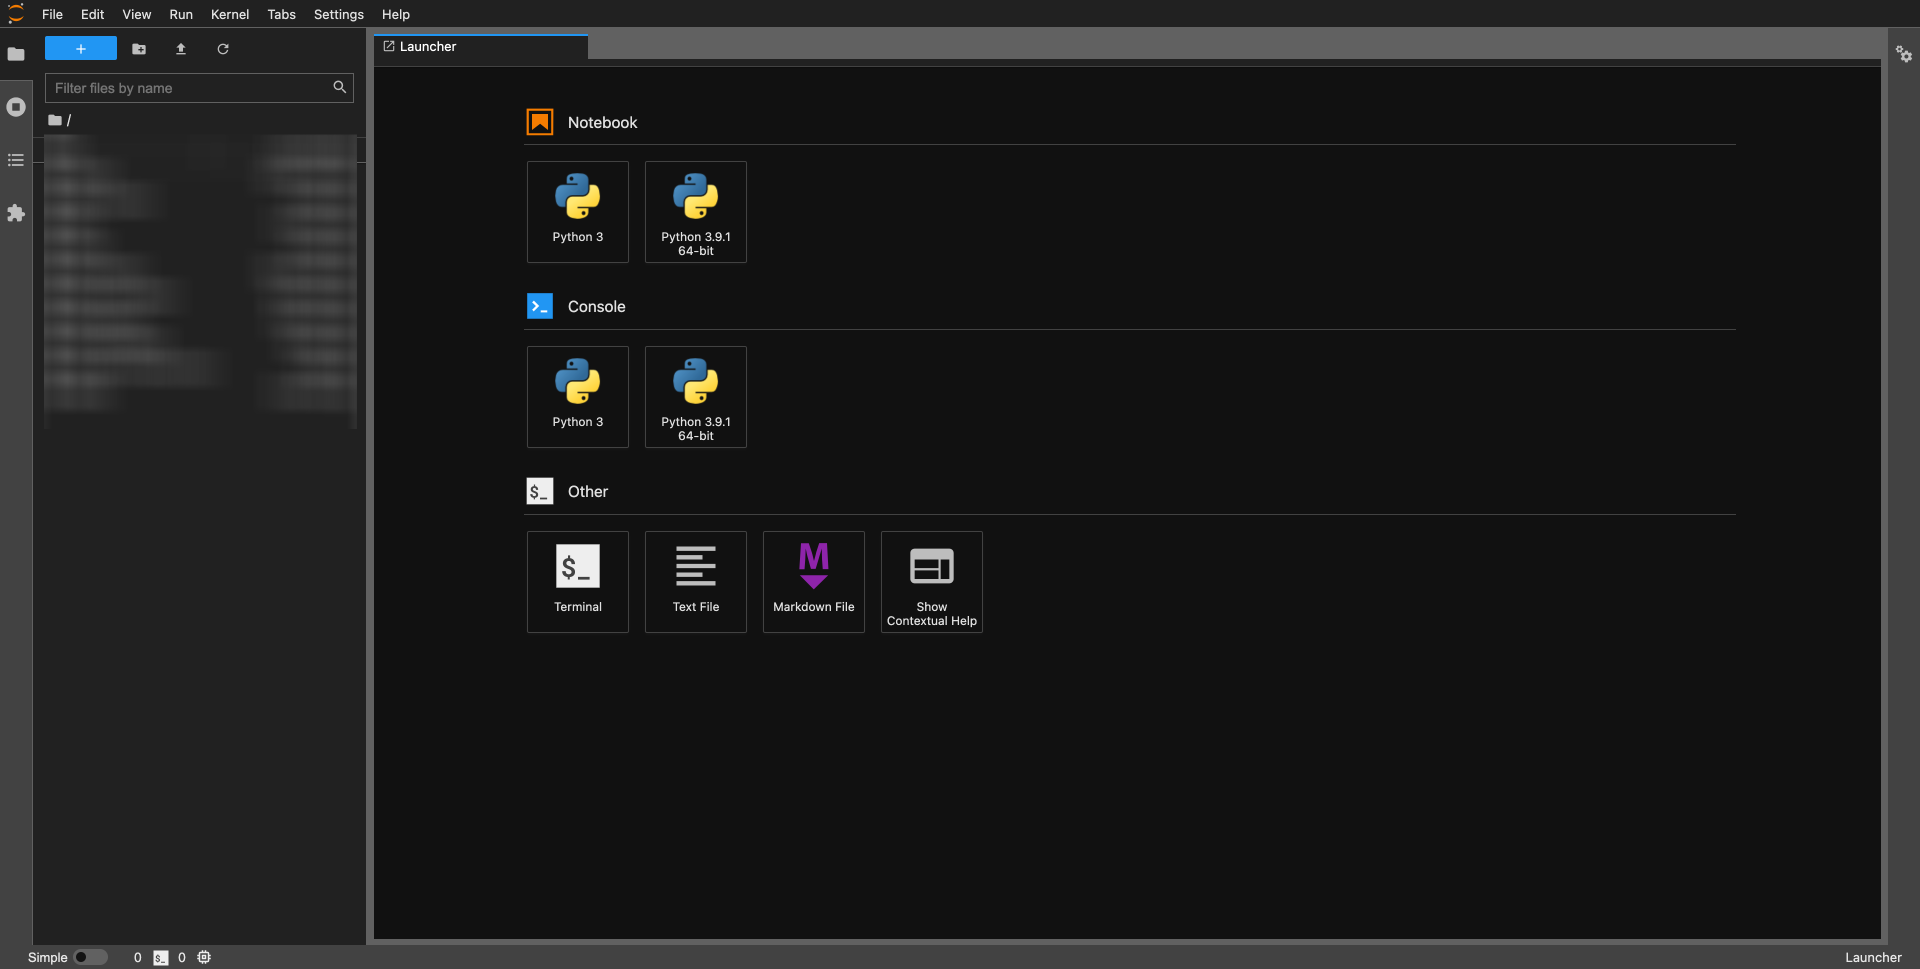
In the Notebook area on the right, add a Notebook and use the code below to build a robot!
The following steps apply to Intel Mac and M1 Mac.
-
Step 1: Open Terminal (command + space activate Spotlight, and enter Terminal)
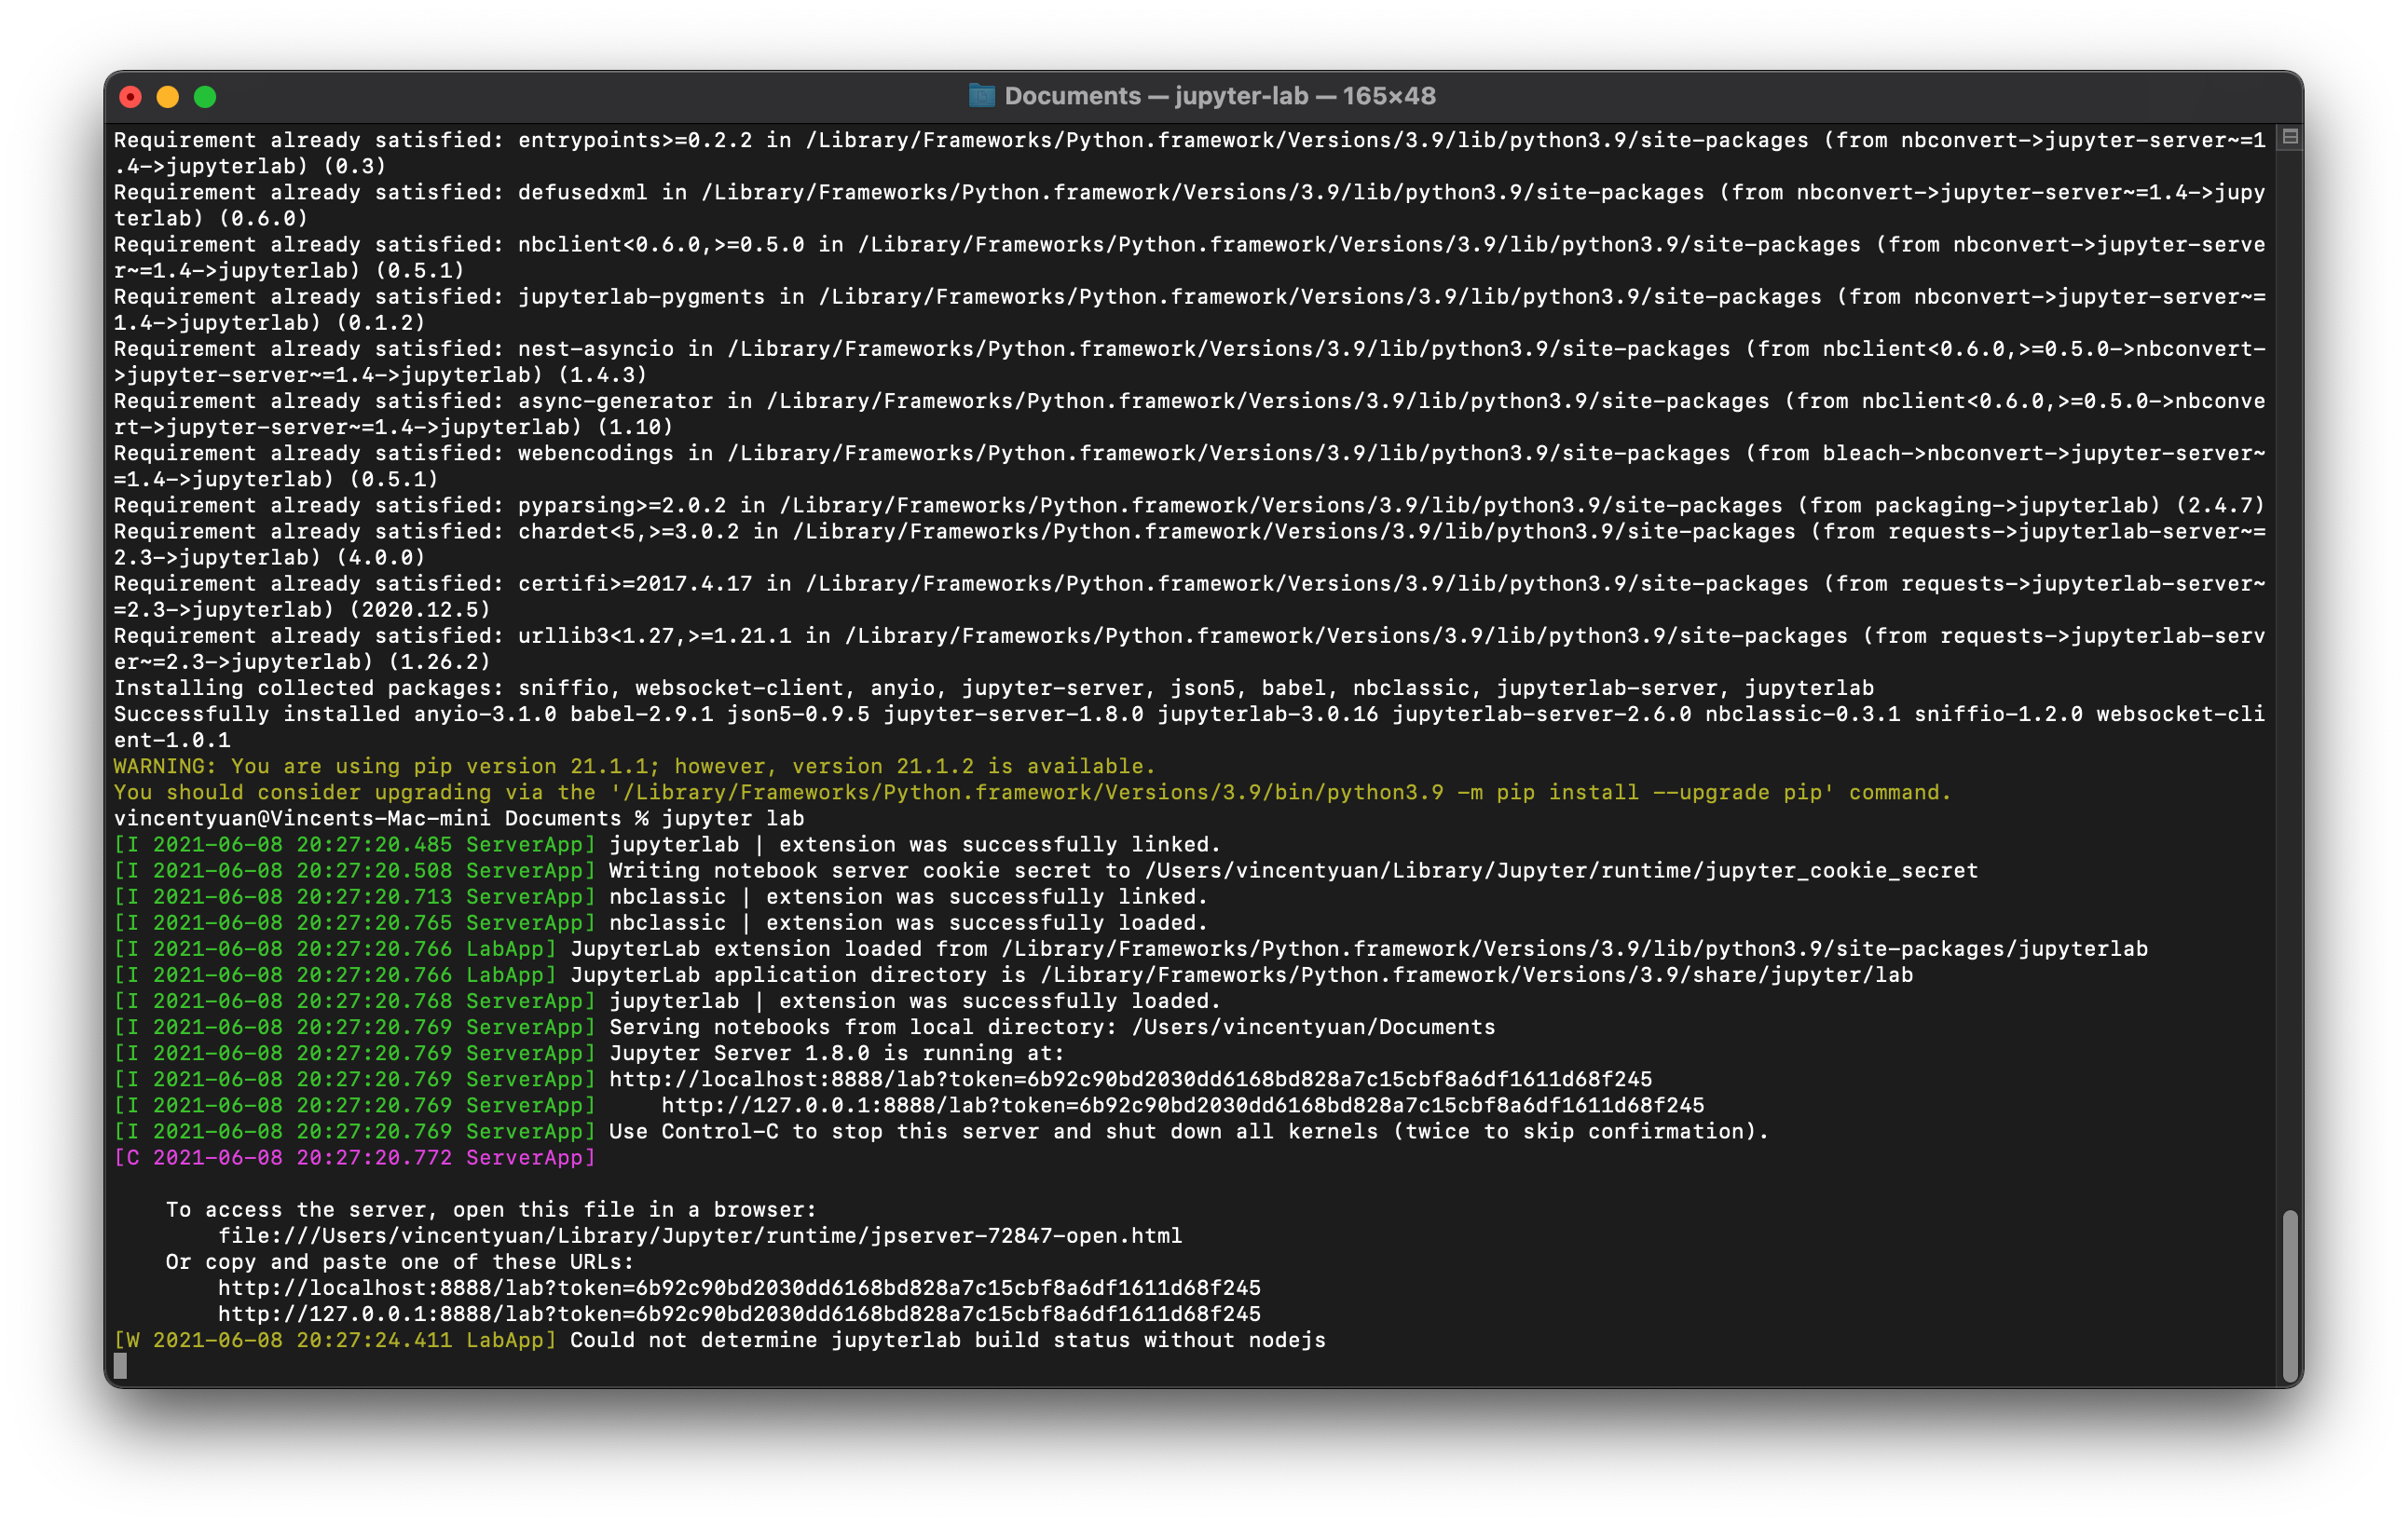
Terminal -
Step 2: Enter
pip3 install jupyter - Step 3: Enter
pip3 install jupyter-lab - Step 4: Enter
jupyter lab
Then you'll see this screen:
In the Notebook area on the right, add a Notebook and use the code below to build a robot!
3 Code
Tip
Run the following code in the Notebook you created.
3.1 Download the Required Packages
# Selenium is commonly used for Web testing automation. Here we will use it to automate the Taobao purchasing process.
!pip install selenium
!which python
The above code returns /opt/anaconda3/bin/python. We will use this address in the following steps.
3.2 Download the Auxiliary Program
- Check the version of your Chrome browser (you can see the software version by entering "About Chrome").
- Go to the official download site of ChromeDriver and download the version that matches your Chrome browser. Then, place the file in the
/opt/anaconda3/binfolder.
from selenium import webdriver
import datetime
import time
Quick Tip: you can use the following time code to quickly set the purchasing time
now = datetime.datetime.now().strftime('%Y-%m-%d %H:%M:%S.%f')
print(now)
Output: 2021-06-18 00:00:00.000000
3.3 Parts of the Robot
def login():
    # Open the Taobao homepage and log in via QR code
    browser.get("https://www.taobao.com")
    if browser.find_element_by_link_text("亲,请登录"):
        browser.find_element_by_link_text("亲,请登录").click()
        print("Please log in quickly via QR code")
    time.sleep(10)

def picking():
    # Open the shopping cart list page
    browser.get("https://cart.taobao.com/cart.htm")
    time.sleep(3)

    # method = 0 selects all items in the shopping cart
    method = 0
    if method == 0:
        while True:
            try:
                if browser.find_element_by_id("J_SelectAll1"):
                    browser.find_element_by_id("J_SelectAll1").click()
                    break
            except:
                print("Could not find the purchase button.")
    # method = 1 manually selects items
    else:
        print("Please manually select the items you want to purchase")
        time.sleep(5)

#Wait for the purchasing time and initiate automatic purchasing. Here we define a buy function
def buy(order_time, browser):
    print(order_time)

    order_placed_status = False
    while order_placed_status != True:
        now = datetime.datetime.now().strftime('%Y-%m-%d %H:%M:%S.%f')
        # Check the time and click "checkout" when the time arrives
        if now >= order_time:
            browser.refresh()
            picking(browser)

            # Click "checkout"
            while True:
                clear_element = WebDriverWait(browser, 10).until(
                            EC.element_to_be_clickable((By.LINK_TEXT, "结 算"))
                        )
                try:
                    if browser.find_element_by_link_text("结 算").is_enabled():
                        browser.find_element_by_link_text("结 算").click()
                        clear_element.click()
                        print("Checkout was successful. Preparing to submit the order")
                        break
                except:
                    pass

            order_element = WebDriverWait(browser, 20).until(
                            EC.element_to_be_clickable((By.LINK_TEXT, "提交订单")))
            # Click "submit order"
            order_element.click()
            order_placed_status = True

            time.sleep(0.01)
3.4 Launch the Robot
browser = webdriver.Chrome()
login()
picking()
3.5 Schedule Automatic Purchasing
order_time = input("Please enter the purchasing time (format: 2021-06-08 19:30:00.000000):")
e.g., Please enter the purchasing time (format: 2021-06-08 19:30:00.000000):2021-06-08 19:55:00.000000
buy(order_time, browser)
4 Final Effect
Please refer to the WeChat public account article for a video demonstrating the tool's functionality: